How to Make an iPad Kiosk from a Website
In this article, we will explain how to make an offline-capable web kiosk using an iPad and any existing website.
Offline Kiosk for iPad allows you to make interactive, full-featured kiosks using any website’s content. What it means for your company’s bottom line is that now you don’t have to create separate content specially for your kiosks, or pay outside contractors to do it. Best of all, the resulting kiosks can run without a network connection of any kind. That makes Offline Kiosk a truly unique and special app.
Before we get started, check out this preview video which shows how we made our own website kiosk in a little under 30 seconds:
To make your own website iPad kiosk, you will need the following:
- iPad device running iOS 8.0 or later with at least 1 GB of available storage.
- Reliable Wi-Fi connection, suitable for downloading 1-2 GB of content.
- Website running on a web server. (Offline Kiosk app allows you to upload local content from desktop computer via USB/Lightning connection but in this article we’ll only use kiosk content downloaded from a website.)
STEP 1: Check Device Storage
Before proceeding with making a web kiosk, we recommend checking your iPad storage. Remember, your iPad must have enough available storage for storing and downloading the entire website. While it is difficult to predict exactly how much storage the kiosk will need for a specific website, we recommend having at least 1GB of storage available for a small to medium website, and up to 4 GB for a large website, including the embedded videos.
To check available storage on iOS device, tap Settings app on home screen > General > Storage & iCloud Usage.
STEP 2: Connect Device to a Reliable Wi-Fi Network
Because a download of the entire website takes time and bandwidth, we don’t recommend using a free or guest Wi-Fi network or a cellular connection. Use your office or home Wi-Fi instead. Before proceeding, make sure that the device is actually connected to a correct Wi-Fi network.
STEP 3: Set up the Kiosk
It is time now to create a new kiosk for your website.
1. Tap “Offline Kiosk” app on device home screen. (If you haven’t installed it yet, get it from the app store.)
2. Tap “+” button on the toolbar > “Create Kiosk“. Note that a new browser view pops up.
3. Tap the address bar on top of the browser view.
4. Type or paste the URL of your website.
5. Tap “Go” on keyboard. The website will load into the browser.
6. Once the website loads, tap the “Create Kiosk” button.
Congratulations! You have created the first iPad kiosk for your website.
STEP 4: Customize the Kiosk
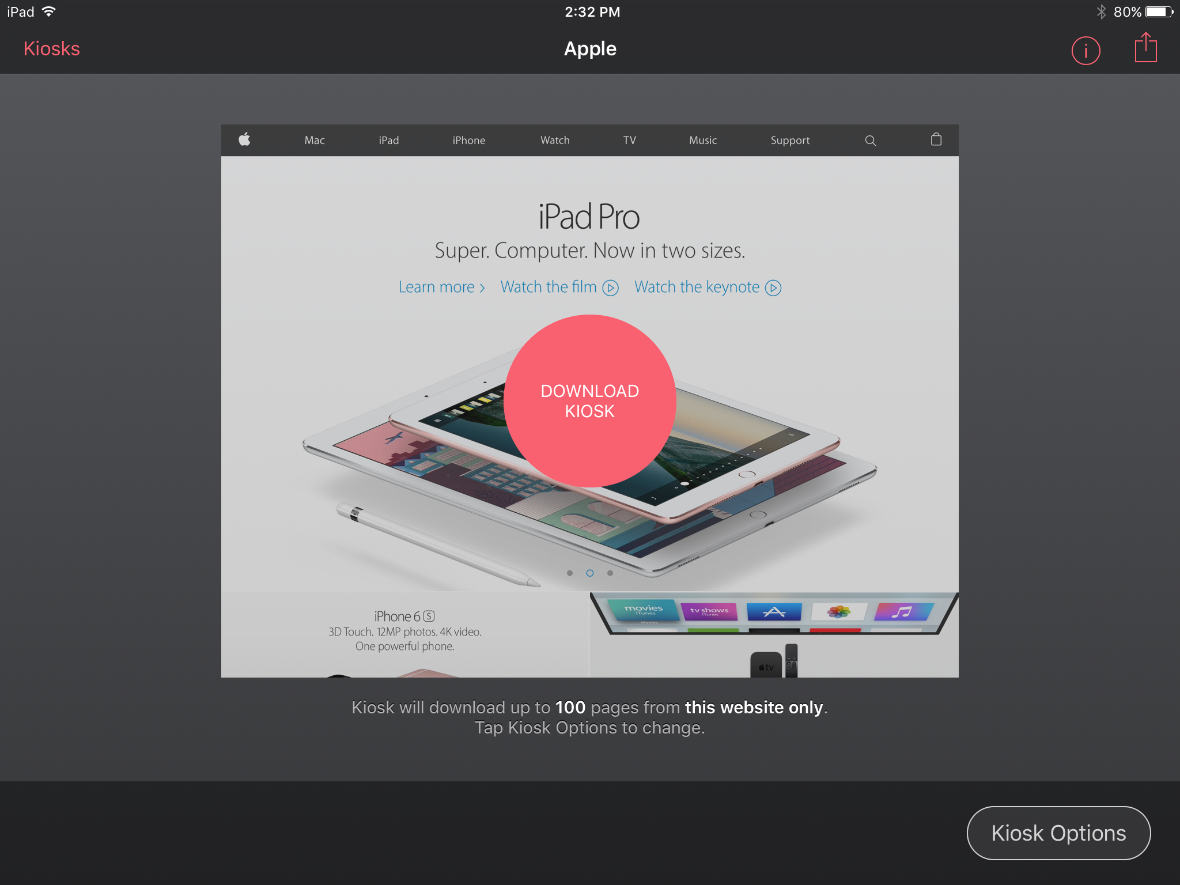
Before you press the Download Kiosk button, we recommend reviewing your kiosk’s settings. If this is a very first kiosk you’re creating, don’t make any changes and just proceed to STEP 5 to get a feel of the overall workflow. You can always return to kiosk options and learn about individual settings later. The default settings are chosen to work well with a wide variety of websites, so normally you don’t even need to change anything. That said, you can always adjust the settings if anything is not up to your preference.
You can access all kiosk settings by tapping the “Kiosk Options” button in the lower right corner of the screen. A balloon popover will appear on screen and display several groups of settings. We’ll briefly discuss each group of settings below.

Download
The options in Download group contain settings related to crawling and downloading of the website. The most important setting is the number of pages. You can choose any number from 10 to 50,000. Other settings allow you to limit crawler to specific linking depth, or to a specific domain name.
Content & Media
The options in Content & Media group affect the features that appear in the pages. For example, you can enable or disable download of video or audio embedded in pages, or make the download agent to present itself as a Mac desktop browser instead of an iPad browser (which is useful for dealing with websites that incorrectly identify iPad as a mobile device and serve a simplified version of the website.)
Website Login
The options in Website Login group allow downloading content from secure websites that require user sign-in before they display any content.
Surveys & Forms
The Surveys & Forms options allow you configure the kiosk so that it accepts web form submissions. You can use web forms for conducting surveys, collecting customer sign-ups, or receiving feedback.
Browser
The options in Browser section allow you to change the way web browser looks and behaves. For example, you can hide back and forward navigation buttons, disable a progress bar, or prevent device from sleeping when it becomes idle. There’s also a setting to allow browsing online.
Advanced
The options in Advanced section, as its name implies, aren’t used often. You can use Advanced options to enable features that are not part of a typical website, such as offline emailing, live updates, update reminders, or push notifications.
Now, your kiosk is ready to download some content to display while offline.
STEP 5: Download the Kiosk Contents
Kiosks that you create in Offline Kiosk app are initially empty. (That is unless you import pre-populated kiosks from another app or device. We’ll post more on that in future articles.) Your new kiosk does not contain any content at all – neither website’s content nor any other kind. To become useful, the kiosk needs to be filled with content. Luckily, Offline Kiosk iPad app comes equipped with a state-of-the-art website crawler and downloader which makes filling a kiosk with content a trivial task.
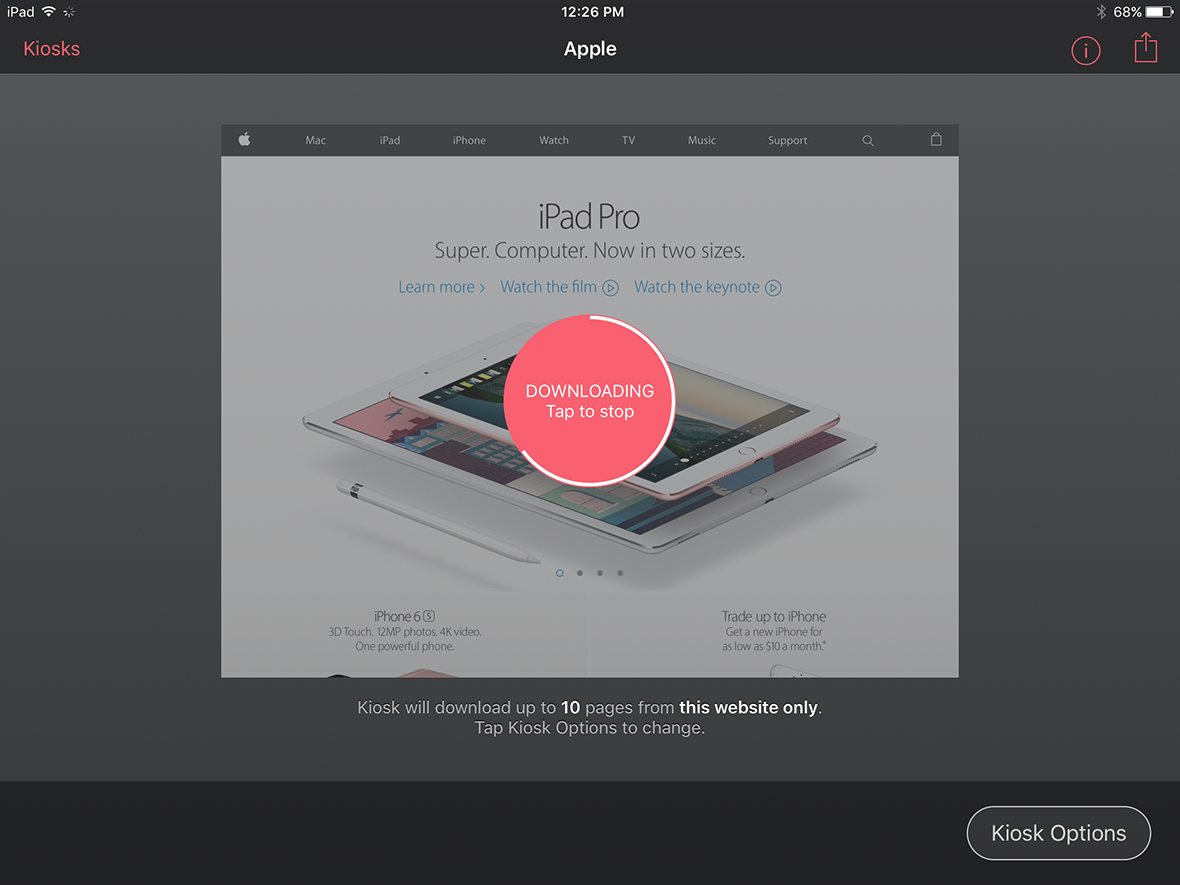
To start download, tap the “Download Kiosk” button. The download will immediately begin. To prevent connection interruptions, we recommend putting the iPad aside while download is in progress. We also recommend that you don’t lock your device during that time, and avoid switching to other apps while the kiosk is downloading.
STEP 6: Launch your Kiosk
You’ll know that the kiosk has finished downloading when the white progress ring makes a full circle and the kiosk displays a launch button instead of the download button. The launch button displays a triangular launch symbol similar to a video play button. Tap the launch button to run your offline kiosk.
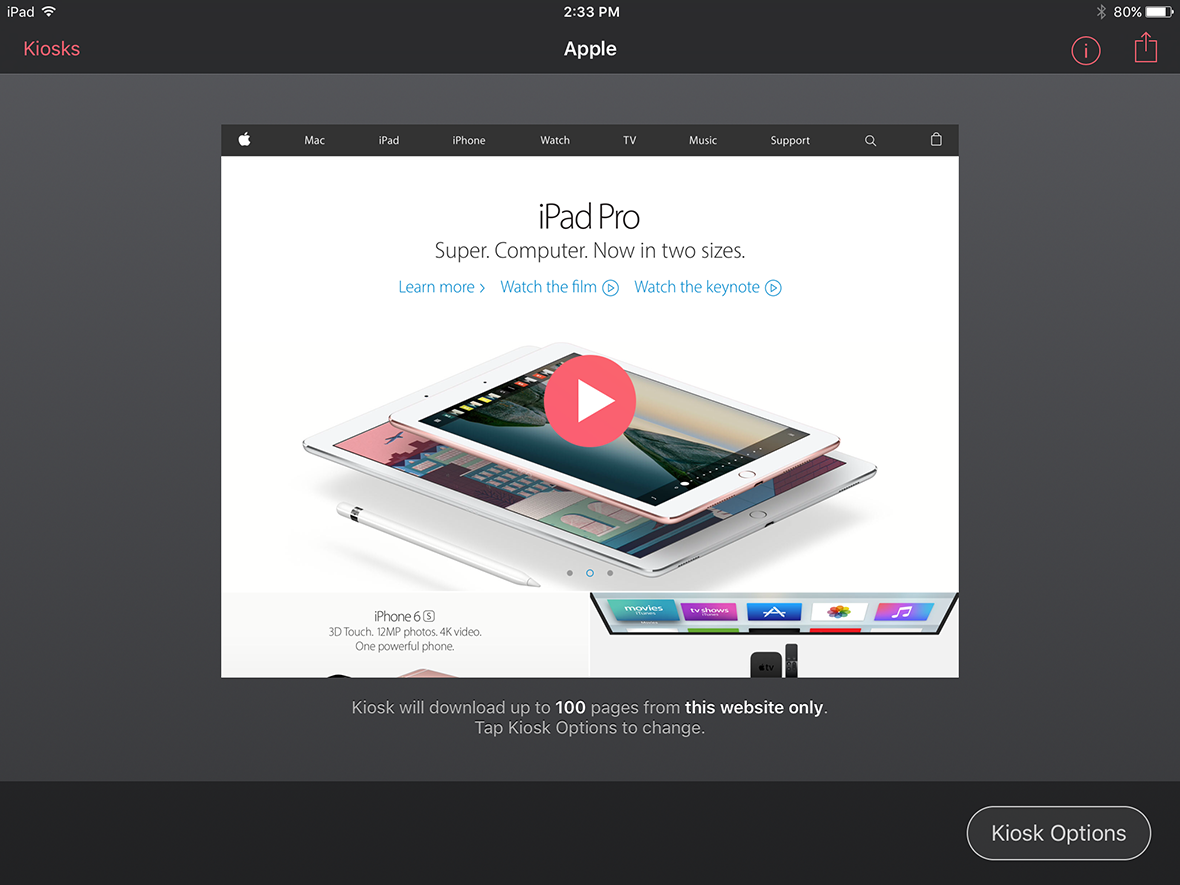
That’s all there is to it! You have made a website-powered, offline-capable iPad kiosk from an existing website. All of the website’s pages are now securely stored in device storage so your kiosk doesn’t need any network connection to run. You can now put the device in airplane mode or disconnect it from all networks and the website will continue to run smoothly even though device is offline.
Questions? Comments? Contact us.